Bài viết này sẽ hướng dẫn các bạn cài đặt MySQL 8.0 trên Fedora 28/27/26
Cập nhật hệ thống
Đăng nhập và cập nhật hệ thống bằng lệnh sau
sudo dnf update
Cài đặt Yum Repository
Để cài đặt yum repository cho MySQL server trên Fedora chúng ta tạo file yum repository như sau:
vim /etc/yum.repos.d/mysql-community.repo
Nội dung file:
[mysql80-community]
name=MySQL 8.0 Community Server
baseurl=http://repo.mysql.com/yum/mysql-8.0-community/fc/$releasever/$basearch/
enabled=1
gpgcheck=1
gpgkey=file:///etc/pki/rpm-gpg/RPM-GPG-KEY-mysql
Sau đó lưu và thực hiện bước tiếp theo
Cài đặt MySQL Server
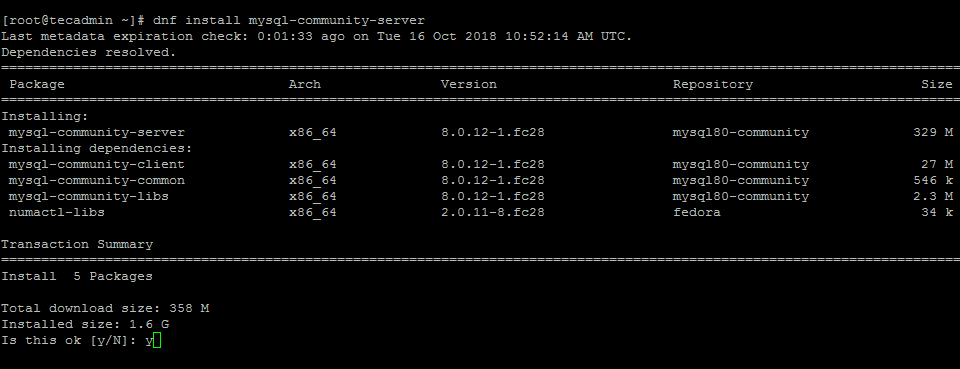
Chạy câu lệnh sau để tiến hành cài đặt
sudo dnf install mysql-community-server
Khởi động và thiết tập MySQL tự khởi động cùng hệ thống bằng lệnh sau:
sudo systemctl enable mysqld.service
sudo systemctl start mysqld.service
Cấu hình MySQL
Sau khi cài đặt MySQL sẽ tạo một mật khẩu random cho user root, chúng ta sử dụng lệnh sau để lấy mật khẩu:
grep 'A temporary password is generated' /var/log/mysqld.log | tail -1
2018-10-16T11:49:31.216147Z 1 [Note] A temporary password is generated for [email protected]: ,yJrusM58kW7
Như trên mật khẩu sẽ là: ,yJrusM58kW7
Thực thi lệnh sau để tiến hành cấu hình MySQL
sudo mysql_secure_installation
Chọn Y để thay đổi mật khẩu cho root, sau đó tiếp tục chọn Y với các thiết lập còn lại
Change the password for root? – Press y and change root password

Remove anonymous users? Press y

Disallow root login remotely? Press y

Remove test database and access to it? (Press y

Reload privilege tables now? Press y
[quangcao]
Kết nối MySQL
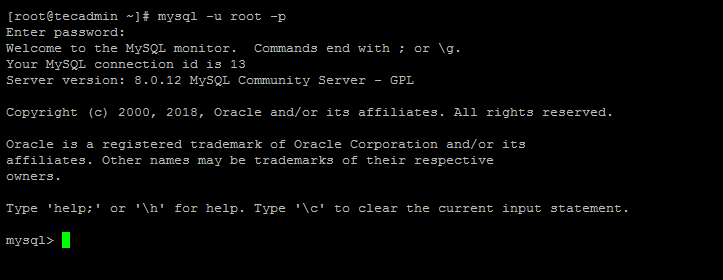
Sau khi cài đặt và cấu hình xong chúng ta dùng lệnh sau để thử kết nối đến MySQL server
mysql -u root -p
Gõ mật khẩu mới đã đổi, nếu xuất hiện màn hình như dưới là quá trình cài đặt đã thành công.
Nếu bạn muốn remote từ máy khác đến MySQL server vừa cài thì phải tạo user remote và cấp quyền cho nó. Ví dụ:
CREATE USER 'remoteuser'@'%' IDENTIFIED BY 'ITFROMZERO123!';

GRANT ALL ON *.* to remoteuser@'%' IDENTIFIED BY 'ITFROMZERO123!';

FLUSH PRIVILEGES;
Sau đó bạn có thể kết nối đến MySQL server qua cổng 3306 với username là remoteuser và password: ITFROMZERO123!
Chúc các bạn thành công.