Open Source Social Network (OSSN) is a free and open source social networking software written in PHP. It is used to create your own social network website and build relationships with your members. Ossn can also be used to build different types of social apps like Private Intranets, Public Networks, and Community. OSSN comes with a powerful user and admin dashboard that can help you build and manage your content on every device. OSSN comes with lots of features including, Photos, Profile, Friends, Smileys, Search, Chat and much more.
In this tutorial, we will be going to learn how to install Open Source Social Network on Ubuntu 18.04 LTS server.
Requirements
- A server running Ubuntu 18.04 LTS
- A non-root user with sudo privileges.
Install LAMP Server
OSSN runs on the web server, written in PHP and uses MariaDB for the database. So, you will need to install Apache, PHP, and MariaDB to your system. OSSN does not support PHP 7.2 yet, so we will install PHP 7.1 from Ondrej repository.
You can add the repository with the following command:
sudo add-apt-repository ppa:ondrej/phpOnce the repository is added, install Apache, MariaDB, PHP, and all required PHP libraries by running the following command:
sudo apt-get install apache2 mariadb-server php7.1 php7.1-mysql php7.1-curl php7.1-json php7.1-cgi libapache2-mod-php7.1 php7.1-mcrypt php7.1-xmlrpc php7.1-gd php7.1-mbstring php7.1 php7.1-common php7.1-xmlrpc php7.1-soap php7.1-xml php7.1-intl php7.1-cli php7.1-ldap php7.1-zip php7.1-readline php7.1-imap php7.1-tidy php7.1-recode php7.1-sq php7.1-intl wget unzip -yOnce all the packages are installed, start Apache and MariaDB service and enable them to start on boot time with the following command:
sudo systemctl start apache2
sudo systemctl enable apache2
sudo systemctl start mariadb
sudo systemctl enable mariadb
Configure Database
By default, MariaDB installation is not secured. You can secure it by running the following script:
sudo mysql_secure_installationAnswer all the questions as shown below:
 Enter current password for root (enter for none):
 Set root password? [Y/n]: N
 Remove anonymous users? [Y/n]: Y
 Disallow root login remotely? [Y/n]: Y
 Remove test database and access to it? [Y/n]: Y
 Reload privilege tables now? [Y/n]: Y
Once the MariaDB is secured, log in to MariaDB shell:
mysql -u root -pEnter your root password and press Enter, then create a database and user with the following command:
MariaDB [(none)]> CREATE DATABASE ossndb;
MariaDB [(none)]> CREATE USER ossn;
Next, grant privileges to the OSSN database with the following command:
MariaDB [(none)]> GRANT ALL PRIVILEGES ON ossndb.* TO 'ossn'@'localhost' IDENTIFIED BY 'password';
Replace ‘password’ with a secure password in the above SQL command and note it down, we need it later during OSSN installation. Next, you will need to run the FLUSH PRIVILEGES command so that the privileges table will be reloaded by MySQL and we can use new credentia$
MariaDB [(none)]> FLUSH PRIVILEGES;
Next, exit from the MariaDB console with the following command:
MariaDB [(none)]> EXIT;
Install OSSN
First, download the latest version of the OSSN with the following command:
cd /tmp
wget https://www.opensource-socialnetwork.org/download_ossn/latest/build.zip
After downloading, unzip the downloaded file with the following command:
unzip build.zipNext, copy the extracted directory to the Apache root directory, create a data directory for OSSN and give proper permissions with the following command:
sudo cp -r ossn /var/www/html/
sudo mkdir /var/www/html/ossn_data
sudo chown -R www-data:www-data /var/www/html/ossn/
sudo chmod -R 755 /var/www/html/ossn/
sudo chown -R www-data:www-data /var/www/html/ossn_data
Next, create an Apache configuration file for OSSN with the following command:
sudo nano /etc/apache2/sites-available/ossn.conf
Add the following lines:
<VirtualHost *:80>
ServerAdmin <a class="__cf_email__" href="https://www.howtoforge.com/cdn-cgi/l/email-protection" data-mce-href="https://www.howtoforge.com/cdn-cgi/l/email-protection">[email protected]</a>
DocumentRoot /var/www/html/ossn
ServerName example.com
<Directory /var/www/html/ossn/>
Options FollowSymlinks
AllowOverride All
Require all granted
</Directory>
ErrorLog ${APACHE_LOG_DIR}/ossn_error.log
CustomLog ${APACHE_LOG_DIR}/ossn_access.log combined
</VirtualHost>
Replace the domain name example.com with your own domain name. Save and close the file, then enable virtual host file and Apache rewrite module with the following command:
sudo a2ensite ossn.conf
sudo a2enmod rewrite
Finally, restart Apache to apply all the changes:
sudo systemctl restart apache2
OSSN will try to access itself by HTTP on the server to check mod_rewrite, this requires that the domain which you use for the installation in the virtual host file /etc/apache2/sites-available/ossn.conf exists in DNS. If you are using a non-existing domain like I’ll do it here with example.com, then this domain needs to be configured in the /etc/hosts file of the server like this:
nano /etc/hoststhe file should contain a line starting with the IP of the server, followed by the domain name. Example:
192.168.1.100 example.com www.example.comSave the hosts file. Otherwise, you will get an error “MOD_REWRITE REQUIRED”.
Access OSSN web installer
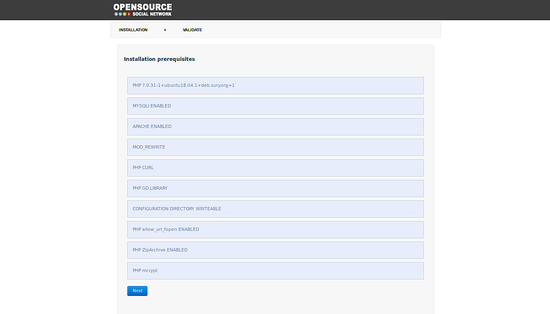
Open your web browser and type the URL http://example.com. You will be redirected to the following page:
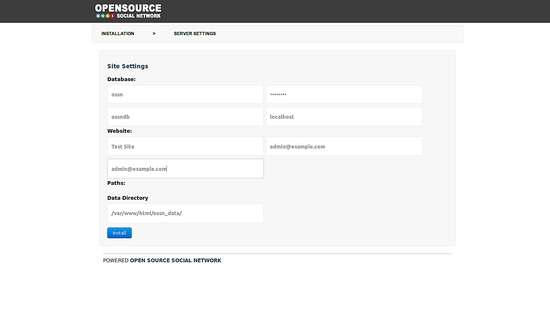
Make sure all the requirements are met. Then, click on the Next button. You should see the following page:
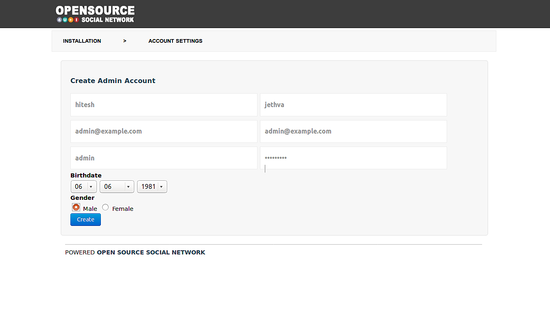
Here, provide your Site name and Database details. Then, click on the Install button. You should see the following page:
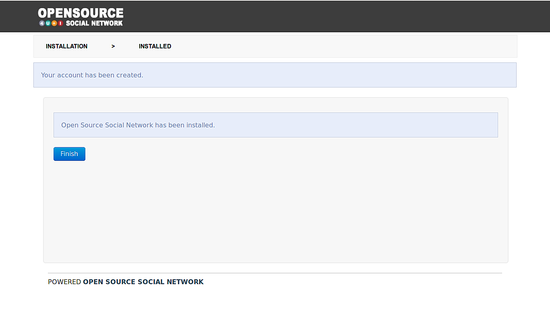
Here, provide your admin user credentials. Then, click on the Create button. Once the installation has been finished, you should see the following page:
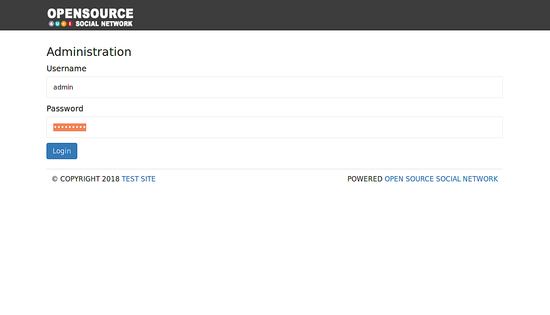
Now, click on the Finish button. You will be redirected to the OSSN log in screen as shown below:
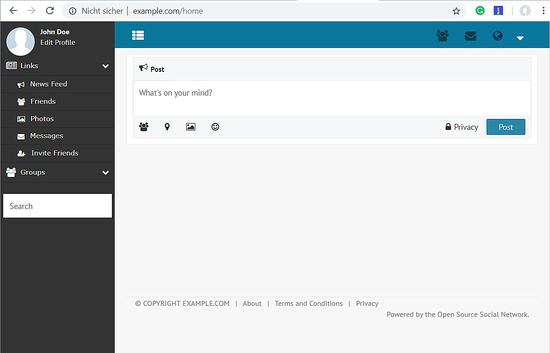
Now, provide your admin username and password. Then, click on the Login button. You should see the OSSN dashboard in the following page:
When you click on ‘view site’ in the menu, you will see the OSSN frontend.
OSSN has been successfully installed on Ubuntu 18.04 LTS.
Virtual machine image download of this tutorial
This tutorial is available as ready to use virtual machine image in ovf/ova format that is compatible with VMWare and Virtualbox. The virtual machine image uses the following login details:
SSH / Shell Login
Username: administrator
Password: howtoforge
This user has sudo rights.
OSSN Login
Username: admin
Password: howtoforge
MySQL Login
Username: root
Password: howtoforge
and
Username: ossn
Password: password
The IP of the VM is 192.168.1.100, it can be changed in the file /etc/netplan/01-netcfg.yaml. Please change all the above passwords to secure the virtual machine.
Source: https://www.howtoforge.com/tutorial/how-to-install-open-source-social-network-ossn-on-ubuntu/

