Introduction: Bringing Physical Infrastructure to the Virtual Cloud
Today, physical to virtual (P2V) server migration is a strategic move many organizations are prioritizing. This approach not only helps reduce hardware costs and save server space but also significantly enhances system manageability, backup, and recovery capabilities.
At my company, where we manage a VMware cluster with 8 ESXi hosts, I’ve implemented dozens of P2V projects, ranging from basic systems to complex configurations. The experiences I’m sharing today are all derived from real-world operations, with VMware vCenter Converter Standalone as the primary tool – a powerful and familiar “assistant” for IT professionals.
What is P2V and Which Tools Support You?
P2V: Unexpected Benefits of “Virtualizing” Infrastructure
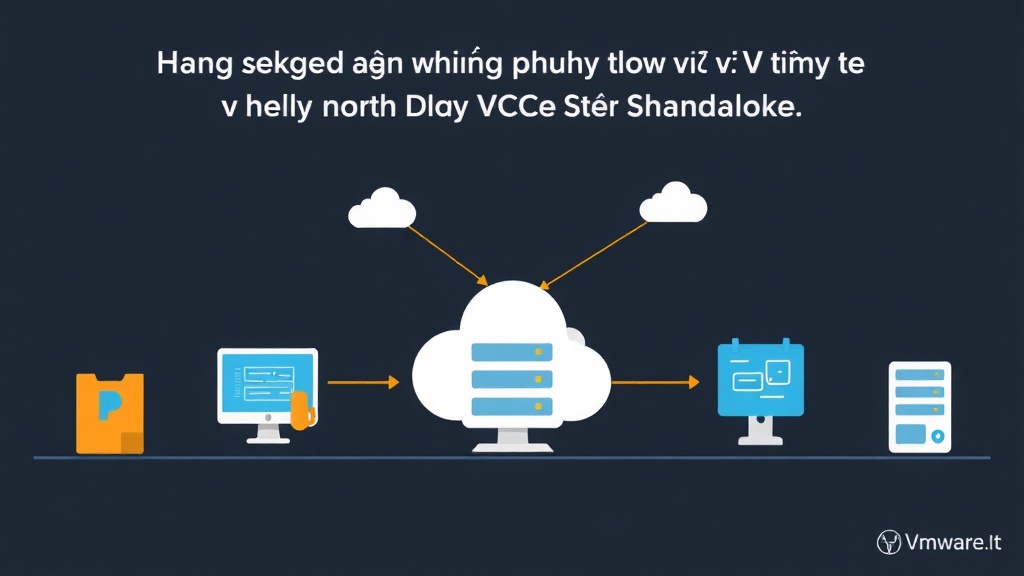
P2V (Physical to Virtual) is the process of transforming an active physical computer system (such as a server or PC) into a Virtual Machine (VM). This virtual machine can then run on various virtualization platforms, such as VMware vSphere (including ESXi, vCenter), VirtualBox, Hyper-V, or KVM.
The benefits of P2V are clear:
- Resource Optimization: Instead of dedicating a physical server to each application, you can consolidate multiple old servers onto a few more powerful physical machines, running dozens of virtual machines. For example, a 4-year-old physical server consuming 500W of power can be virtualized and run on an ESXi host along with 5-7 other virtual machines, significantly saving energy.
- Cost Reduction: Save on electricity, space, cooling, and new hardware purchasing costs. On average, a successful P2V project can cut 20-30% of infrastructure operating costs in the first 2-3 years.
- Easy Management: Virtual machines are easy to back up, migrate, clone, and manage centrally through tools like vCenter. With just a few clicks, you can move a VM from one host to another without downtime.
- Disaster Recovery: The ability to quickly restore systems from virtual machine backups. Instead of taking hours to restore a physical server, a VM can be recovered in just a few minutes from a snapshot.
VMware vCenter Converter Standalone: The “Magic Wand” for P2V
VMware vCenter Converter Standalone is a free tool from VMware, designed to simplify the P2V migration process. It supports converting physical machines running Windows or Linux to VMware virtual machine formats (such as VMware Workstation, Fusion, or directly to ESXi/vCenter).
The strength of Converter Standalone lies in its intuitive, easy-to-use interface and high customizability. You can adjust the target virtual machine’s configuration directly during the conversion process. I always trust this tool because of the stability and efficiency it delivers in a production environment.
What You Need to Prepare Before P2V
The P2V process is not as simple as “pressing a button.” To ensure success and avoid risks, you need thorough preparation:
- Source Physical Server: Ensure the machine is operating stably, has sufficient resources (CPU, RAM, Disk), and good network connectivity. You need administrative (Administrator/root) privileges on the source machine.
- Target Server (ESXi Host/vCenter Server): Requires sufficient resources (CPU, RAM, storage capacity on the Datastore) to house the new virtual machine. Ensure network connectivity to the source machine and access permissions to vCenter/ESXi.
- Disk Space: The Datastore on ESXi must have enough space for all data from the physical machine. Converter allows you to select which disks to convert, helping optimize space usage.
- Network and Firewall: The source and target machines must be able to “see” each other over the network. If connection issues arise, you may temporarily disable the Firewall on the source machine.
- Backup: Always back up important data from the physical server before P2V. This is a golden rule for all system operations; do not skip this step.
Detailed Practice: Step-by-Step P2V with VMware vCenter Converter Standalone
Here are the steps I typically follow when performing a P2V migration of a physical server:
1. Download and Install VMware vCenter Converter Standalone
You can download this tool directly from the VMware website (a user account is required). The installation process is straightforward: run the file and follow the instructions, selecting the full “Standalone” version installation.
Important Note: It is recommended to install Converter on a separate machine, not the machine you intend to convert. This helps avoid resource conflicts or impacting the performance of the source machine during the P2V process.
2. Launch Converter and Select Source System
Open VMware vCenter Converter Standalone, and you will see the main interface. Select “Convert machine”.
Under the “Source System” section, you have the following options:
- Powered-on machine: Used when the physical machine is running.
- Powered-off machine: Used when you have an image file of the physical machine.
In this article, I will focus on the common scenario: converting a running machine (Powered-on machine). You can choose:
- Local machine: Converts the computer where Converter is installed.
- Remote Windows machine / Remote Linux machine: Converts another computer on the network. This is the option I use most frequently.
If you select Remote machine, you need to enter the IP Address or Hostname, User name, and Password of the physical machine. This account must have administrative privileges.
# To check SSH connectivity to a Linux machine from the Converter machine (assuming you are on Linux or have an SSH client tool)
ssh username@ip_address_may_vat_ly
3. Select Destination System
Next, under the “Destination System” section, you will choose where to store the new virtual machine. I typically select “VMware Infrastructure virtual machine” to deploy directly onto an ESXi host or vCenter Server.
Enter the IP Address/Hostname, User name, and Password for the vCenter Server or ESXi Host, then click “Next”. Afterward, select the Datacenter, Cluster, and the ESXi host where you want to place the virtual machine. Finally, provide a name for the new virtual machine.
# Example of information to enter for vCenter connection
# vCenter Server: vcenter.yourdomain.com
# User name: [email protected]
# Password: YourStrongPassword
4. Configure Conversion Options
This is a crucial step for optimizing the virtual machine after conversion. I always thoroughly review this section:
-
Data to copy:
- By default, Converter selects all disks. You can “Edit” to deselect unnecessary disks (e.g., backup disks, temporary data disks). This helps reduce conversion time and significantly saves Datastore capacity.
- Disk provisioning: Choose “Thin Provision” if you want the virtual machine to only occupy space equivalent to its actual data. I usually prioritize Thin Provision to optimize Datastore usage, only using Thick when extremely high performance is required.
-
Devices:
- You can adjust the CPU, RAM, and Network Adapter for the virtual machine. Configure them to suit the needs of the virtual system; it’s not necessary to retain the physical configuration.
- Note: It’s recommended to choose a network card type compatible with the VMware environment (E1000 or VMXNET3). VMXNET3 offers significantly better performance.
-
Advanced options:
- “Power on virtual machine after conversion”: This option automatically starts the virtual machine. I recommend deselecting it. Take time to review the configuration and disconnect the physical machine before starting the virtual machine for the first time.
- “Install VMware Tools”: You can choose to install it immediately or manually after conversion.
5. Review Summary and Start Conversion
Once configured, you will see the “Summary” screen. Review all settings carefully to ensure everything is correct. If there are any errors, you can easily go back to previous steps to make corrections.
When everything is satisfactory, click “Finish” to begin the conversion process. The completion time depends on the data volume, network speed, and the performance of both the source and target servers.
6. Monitor Progress and Handle Common Issues
Converter Standalone will display the conversion progress; this is when patience is required. During operation, I have encountered some common issues:
-
Network Connection Error: Often caused by the Firewall on the source machine blocking ports or incorrect login credentials. Solution: Recheck information, temporarily disable the Firewall on the physical machine, or review the IP range and subnet mask. For example: check ports 443, 902 if connecting to ESXi.
# Check firewall status on CentOS/RHEL systemctl status firewalld sudo systemctl stop firewalld # Temporarily stop firewalld # Check firewall status on Ubuntu sudo ufw status sudo ufw disable # Temporarily disable ufw -
Insufficient Datastore Space: The virtual machine cannot be created because the Datastore on ESXi is full. Solution: Free up space on the Datastore, or select another Datastore with sufficient capacity (e.g., temporarily move non-critical VMs to another Datastore, or attach additional physical disks).
-
IP Conflict after Conversion: If both the physical and virtual machines start with the same IP address, a conflict is inevitable. Solution: Always disconnect the network or completely shut down the physical machine before starting the virtual machine for the first time. Then, reconfigure the IP for the virtual machine if necessary.
My personal experience is to always perform a full data backup before P2V for important servers. Moreover, if conditions permit, try testing the P2V process in a dev/staging environment first. This helps ensure everything runs smoothly when applying it to actual production systems.
Conclusion: Towards a Flexible and Efficient Infrastructure
Converting physical servers to virtual machines with VMware vCenter Converter Standalone is an essential skill for every system engineer. It opens the door to a more flexible, easier-to-manage, and far more resilient infrastructure compared to maintaining individual physical servers.
By adhering to the preparation steps, executing carefully, and proactively addressing issues, you can confidently complete P2V projects. I wish you success in virtualizing and optimizing your IT infrastructure!