Local Storage: The “Achilles’ Heel” of Cluster Systems
When I first started with Proxmox, I found myself in a difficult dilemma. Even though I had set up an impressive 3-node cluster, when one node’s hard drive suddenly failed, all the virtual machines (VMs) on it went down with it. The problem was that the data was stuck on local storage. When the node crashed, the remaining nodes—despite their readiness to help—couldn’t do anything because they couldn’t access the VM’s disk files.
At that point, High Availability (HA) was nothing more than a theoretical concept. Customers were calling to complain, and I had to scramble to remove hard drives or wait for replacement parts just to hope for data recovery. This is exactly why you need a Shared Storage system to unlock the true power of Proxmox.
Why doesn’t data automatically “jump” to another node?
By default, a Proxmox Cluster only manages the “soul”—the VM configurations and CPU/RAM states. The “body”—the disk data—remains fixed on the physical drives of each individual server. Without a storage layer where all nodes can read and write simultaneously, Live Migration (moving VMs without downtime) or automatic recovery during a failure is impossible.
A common mistake many administrators make is not planning storage from the beginning. By the time the system grows, converting disk formats or moving terabytes of data over the network becomes a nightmare for both performance and time.
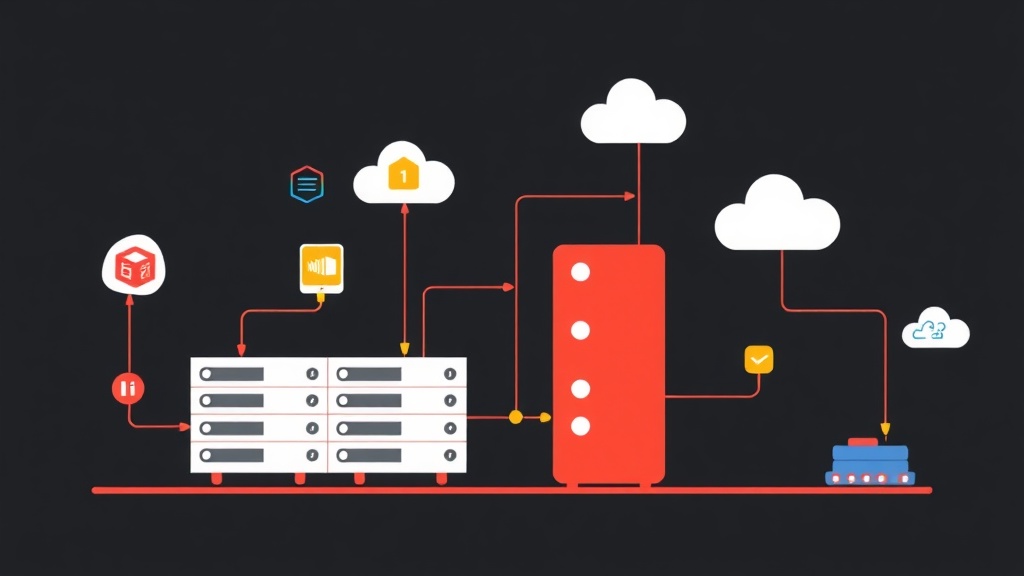
Centralized Storage Options: Which is the Optimal Choice?
There are three main directions to solve the storage puzzle in a cluster:
- Standalone NAS/SAN (NFS, iSCSI): Using dedicated devices like Synology or TrueNAS. This method is simple but creates a “Single Point of Failure” (SPOF). If the NAS encounters an issue, the entire Proxmox Cluster is completely paralyzed.
- GlusterFS: Once a rising star, its integration with Proxmox is no longer smooth. Performance often fluctuates and becomes difficult to control as the number of files increases.
- Ceph Storage: This is the “heavy artillery” bundled with Proxmox. It turns discrete hard drives on each node into a massive data pool. Data is intelligently replicated across multiple nodes.
Based on practical deployment experience, I can confirm that Ceph is the #1 choice. It helps you build a Hyper-Converged Infrastructure (HCI) model. Your servers handle both Compute and Storage, optimizing hardware costs while ensuring the highest level of data safety.
Step-by-Step Guide to Configuring Ceph Storage on Proxmox VE
In the Lab system I’m currently running with 12 VMs and Containers, Ceph acts as the backbone that keeps everything operating smoothly. Here is a 5-step process to set up a stable Ceph cluster.
Step 1: Infrastructure Preparation (A Critical Factor)
Ceph is extremely “sensitive” to network speed. Running Ceph on a 1Gbps network is a fatal mistake that causes latency to spike, leading to constant VM lag. Pro tip: Use at least 10Gbps network cards (e.g., Intel X520 or Mellanox ConnectX-3) and a minimum of 3 nodes to ensure Quorum.
- Each node needs at least one completely empty hard drive to serve as an OSD (Object Storage Daemon).
- Prioritize SSDs or NVMe. With Ceph today, using HDDs for virtualization tasks is a nightmare in terms of IOPS.
Step 2: Installing Ceph
On the Web GUI, select Node -> Ceph. Click Install Ceph and choose the latest version (such as Quincy or Reef). If you’re a fan of the command line, SSH into the node and execute:
pveceph installAfter that, initialize a private network for Ceph. Separating storage traffic from VM traffic makes the system more stable and avoids bottlenecks during data synchronization.
pveceph init --network 10.10.10.0/24Step 3: Setting up Monitor (MON) and Manager (MGR)
The Monitor acts as the “brain,” maintaining the status map of the entire cluster. To meet HA standards, you must have at least 3 Monitors located on 3 different physical nodes. The process is simple: Go to Ceph -> Monitor -> Create on each node.
The Manager (MGR) assists in performance monitoring and provides detailed metrics via the dashboard. You should also install MGR on all nodes that have a Monitor.
Step 4: Creating OSDs (Feeding the Pool)
The OSD will take direct control of physical hard drives to store objects. Under Ceph -> OSD, select Create: OSD and point it to an empty drive (e.g., /dev/nvme0n1).
Practical Tip: If you have high-speed NVMe drives and standard SATA SSDs, separate the DB/WAL to the NVMe. This technique can help Ceph write speeds increase by 2-3 times compared to the default configuration.
Step 5: Initializing the Pool and Proxmox Integration
Finally, we group the OSDs into a Pool. Go to Ceph -> Pools -> Create with the following parameters:
- Size: 3 (Data is replicated into 3 copies across 3 nodes).
- Min Size: 2 (Allows writing if at least 2 copies are active).
- Add as Storage: Check this box so Proxmox automatically recognizes the Pool as a storage location for virtual machines.
# Check system health
ceph -s
If the status line displays HEALTH_OK, your system is ready for action.
Critical Lessons from the Field
After several “painful” experiences crashing clusters, I’ve derived 4 golden rules:
- The Majority Rule: Never run Ceph with only 2 nodes. When one node is under maintenance, the remaining node will switch to Read-only mode due to loss of Quorum, causing all VMs to freeze.
- 80% Safety Threshold: When OSD capacity exceeds 85%, Ceph will issue a red warning. If it hits 95% (Full Ratio), the cluster will stop all write commands. Expanding at this point is extremely difficult because the system is locked.
- Separate Back-end Network: If possible, use two 10Gbps cards in a Bond (LACP) exclusively for Ceph synchronization. Low latency is the key to VMs running as smoothly as they would on local storage.
- Proactive Failed Drive Handling: When you see a drive’s S.M.A.R.T. indicators looking bad, proactively mark that OSD as
out. Ceph will automatically move data to healthy drives before the faulty drive dies completely.
Integrating Ceph into Proxmox VE is a giant leap for your infrastructure. I once tried pulling the power cord on a node in my lab cluster; thanks to Ceph and HA, the VMs only took a few seconds to automatically restart on another node. The feeling of a self-healing system is truly amazing.
I hope this guide helps you feel more confident in your deployment. If you encounter any errors during configuration, don’t hesitate to leave a comment, and I’ll help you right away!