Quick Start: Enable Memory Ballooning and KSM in 5 Minutes
My Proxmox VE homelab runs 12 VMs and LXC containers on a 32GB RAM mini PC, provisioned using Terraform on Proxmox VE. At this scale, memory is always exhausted long before CPU. With default settings, you can only allocate 7–8 VMs (at 4GB each) before completely running out of RAM. Here are 3 quick steps to enable ballooning and verify KSM so you can squeeze in another 3–4 VMs while keeping everything running smoothly.
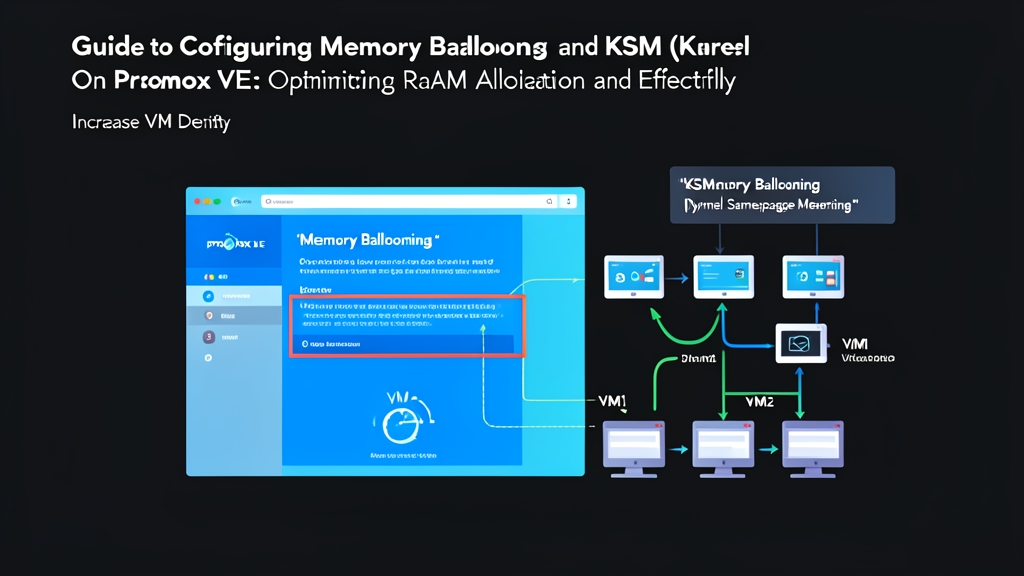
Step 1: Enable Memory Ballooning in the Proxmox Web UI
- Log in to the Proxmox VE Web UI, select the target VM, and go to Hardware > Memory.
- Double-click the Memory row, then check the Advanced box.
- Configure the settings: Memory (MiB) is the maximum ceiling the VM can receive during peak loads (e.g.,
4096), while Minimum memory (MiB) is the safe floor the host is allowed to reclaim down to (e.g.,2048). - Check the Ballooning Device option and click OK to save.
Step 2: Install QEMU Guest Agent Inside the VM
Without the agent, Proxmox cannot accurately determine the actual RAM utilized by the guest OS. It will mistake Linux cache/buffer memory for actively used RAM and refuse to reclaim it.
For Debian or Ubuntu guests:
sudo apt update && sudo apt install -y qemu-guest-agent
sudo systemctl enable --now qemu-guest-agent
For RHEL, AlmaLinux, or Rocky Linux guests:
sudo dnf install -y qemu-guest-agent
sudo systemctl enable --now qemu-guest-agent
Step 3: Confirm KSM Is Running on the Host
Open a shell on your Proxmox node and run the following verification commands:
systemctl status ksmtuned
cat /sys/kernel/mm/ksm/run
An output of 1 indicates that KSM is active. Proxmox enables this daemon by default; however, the stock trigger thresholds kick in rather late, which we will fine-tune below.
How It Works: How Ballooning and KSM Save Host RAM
By default, KVM allocates memory statically without configuring RAM hotplug on Proxmox VE. If you assign 4GB of RAM to a VM, the host reserves the entire 4GB even if the guest only uses 800MB. The combination of Ballooning and KSM eliminates this waste through two entirely distinct approaches.
1. Memory Ballooning: Reclaiming Idle RAM
This mechanism relies on the virtio_balloon driver running directly inside the guest kernel. Think of it like inflating a balloon inside the VM’s living room:
- When the host runs low on RAM: The hypervisor instructs the driver to inflate the balloon. The driver immediately requests a block of RAM from the guest OS (e.g., 1.5GB) and locks it. It signals the host: "I have locked this memory; the guest OS cannot touch it." The host then reclaims the corresponding physical memory and allocates it to other VMs in need.
- When the guest VM needs more RAM: Guest applications request additional memory. The host immediately commands the balloon to deflate. The balloon shrinks, returning free RAM to the guest operating system to handle workloads.
Important note: If you forget to install qemu-guest-agent, the host can only see the overall memory consumed by the KVM process on the host level. Without guest metrics, balloon inflation and deflation operate blindly and become erratic.
2. KSM (Kernel Samepage Merging): Merging Identical Memory Pages
Running 5 VMs that all use Ubuntu 22.04 LTS from a Packer golden image pipeline? Thousands of system libraries like libc.so, static binaries, and kernel code loaded into RAM across all 5 machines are byte-for-byte identical.
KSM runs in the background periodically scanning 4KB memory pages. When it identifies identical pages, the kernel merges them into a single shared physical page and flags it as Copy-on-Write (CoW). All 5 VMs read from this shared page seamlessly. Only when a VM writes new data does the kernel duplicate that page into private memory for that specific VM. This delivers massive memory savings.
Practical Tuning: Tweaking KSM for Faster Memory Reclamation
By default, ksmtuned only starts merging pages when host free memory drops below 20%. To make KSM reclaim memory earlier or reduce its CPU consumption, you need to adjust its configuration file.
1. Edit /etc/ksmtuned.conf
Open the file with nano:
nano /etc/ksmtuned.confCore parameters to tune:
# RAM monitoring frequency (in seconds)
KSM_MONITOR_INTERVAL=30

# Free RAM threshold percentage (%): KSM starts scanning when free RAM drops below this
KSM_THRES_COEF=25

# Milliseconds the kernel sleeps between scans (increase to reduce CPU load)
KSM_SLEEP_MSEC=50
Save the file and apply the changes immediately by restarting the service:
systemctl restart ksmtuned2. Measure Actual RAM Saved by KSM
Don’t guess—check exactly how many megabytes KSM has reclaimed using this one-liner:
pages_sharing=$(cat /sys/kernel/mm/ksm/pages_sharing)
page_size=$(getconf PAGE_SIZE)
echo "Actual RAM reclaimed: $(( pages_sharing * page_size / 1024 / 1024 )) MB"
On my 12-VM lab setup, this number consistently hovers between 3.8GB and 4.5GB of RAM. That equates to enough free memory to spin up 2 additional Docker test clusters without spending a dime on hardware upgrades.
Safety Checklist: Avoiding Common Performance Pitfalls
- Steer Clear of Databases and In-Memory Caches: Never enable ballooning for PostgreSQL, MySQL, Redis, or Elasticsearch. Hardcode
min_memory = max_memoryfor these workloads. Database engines aggressively use all available RAM for buffers and caches. When the host abruptly forces memory reclamation, the guest kernel is prone to triggering the OOM killer or swapping heavily, causing disk I/O to spike and applications to freeze. - Watch Out for CPU Overhead: Continuously scanning page tables consumes between 2% and 8% of a CPU core. If your node runs heavy compilation or rendering workloads (>85% CPU load), consider increasing
KSM_SLEEP_MSECto80-100to yield CPU cycles back to your applications. - Install Drivers for Windows VMs: Windows does not ship with virtio drivers out of the box. To utilize ballooning, mount
virtio-win.iso, navigate to theBalloon/directory, install the matching driver (typicallyblnsvr.exe), and start theqemu-gaservice. Without these drivers, Windows will completely ignore RAM ballooning commands from Proxmox. - Keep a Host Swap Safety Net: RAM overcommit always carries risk. If multiple VMs experience simultaneous load spikes before KSM can merge pages, the host must offload memory to swap. Place swap on an NVMe drive and set
sysctl vm.swappiness=10so the system prioritizes physical RAM and swaps only when memory is critically depleted.