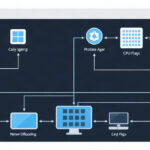
It’s Time to Retire Local Account Management on Proxmox
Managing one or two Proxmox nodes with a few VMs using local accounts is simple. But imagine when the system grows to 5-10 nodes (a Cluster) and the IT team adds three new members. Repeating the process of creating users and assigning passwords on every node is the fastest way to waste your time on menial tasks. Not to mention, whenever an employee leaves, auditing and deleting accounts across every system becomes a security nightmare.
In my homelab environment with about 12 VMs and containers, I integrated Active Directory (AD) early on. Instead of remembering the root password for every node, I only need a single account. Proxmox simply “borrows” the authentication service from AD. Everything from password changes to account lockouts happens centrally at the Domain Controller.
Here are three reasons why I always prioritize this setup:
- True Single Sign-On (SSO): Use the same Windows account you work with to log into Proxmox.
- Role-Based Access Control (RBAC): The
IT-Adminsgroup has Full Control, while theDev-Teamis only allowed to view the console or Start/Stop their own virtual machines. - Risk Mitigation: With just one click to Disable an account in AD, all access to the virtualization infrastructure is cut off immediately.
Information Needed from the Domain Controller
Before configuring Proxmox, open your AD management tool and note down the following parameters:
- DC IP/Hostname: For example,
192.168.1.10ordc01.itfromzero.local. - Base DN: The starting point for Proxmox to search for users. Example:
ou=Users,dc=itfromzero,dc=local. - Bind DN: A Service Account with Read-only permissions that Proxmox uses to query LDAP. Example:
cn=proxmox_svc,ou=ServiceAccounts,dc=itfromzero,dc=local. - Bind DN Password.
Important Note: Never use a Domain Admin account as the Bind DN. Create a dedicated user and set the password to “Never expires” to avoid sudden connectivity issues.
Steps to Connect Proxmox to LDAP/AD
Step 1: Define a New Realm
Access the Proxmox Web GUI as root. Navigate to Datacenter > Permissions > Realms. Click Add and select Active Directory Server.
In the window that appears, fill in the basic details:
- Realm ID: Choose a recognizable name like
AD-COMPANY. This will appear in the dropdown menu at login. - Domain: Your domain name (e.g.,
itfromzero.local). - Server: The IP address of your Domain Controller.
- Default: Check this if you want Proxmox to select this Realm automatically on the login page.
Step 2: Authenticate the Bind User
Select the newly created Realm and click Edit. Now you need to enter the exact Bind DN. If the DN string is too long or difficult to remember, open PowerShell on your Windows DC and run:
dsquery user -name proxmox_svcCopy the result and paste it directly into the Bind DN field in Proxmox to ensure 100% accuracy.
Step 3: Synchronize Groups (Sync Options)
To automate permissions, you need to configure the Sync Options tab. Set the Group DN to the OU containing your technical groups. For Scope, select Subtree so the system scans deep into sub-OUs.
After saving, click the Sync button. If the screen displays a list of users and groups with an OK status, congratulations—you have successfully connected.
Virtual Machine Permissions (RBAC): A Smarter Way
After synchronization, AD users still don’t have permission to do anything in Proxmox. Instead of assigning permissions to individuals, assign them to Groups (Group-based Permissions). This makes managing personnel much easier.
- Go to Datacenter > Permissions > Groups to check the synced groups (usually ending in
@AD-COMPANY). - Under Permissions, click Add > Group Permission.
- Path: Select
/vmsto grant permissions across all VMs, or choose a specific Pool to limit the scope. - Role: Select
PVEVMAdminfor the technical team orPVEAuditorfor audit teams who only need to view logs.
If you prefer using the command line, here is how to quickly assign the Administrator role to the IT group:
pveum acl modify / -group "IT_Admins@AD-COMPANY" -role AdministratorTroubleshooting Common Real-World Issues
During real-world deployments, I often encounter these two common issues:
1. “Invalid credentials” Error Despite Correct Password
90% of the time, this is caused by time drift. Proxmox and the DC must have synchronized clocks within a 5-minute margin. Check the NTP status on Proxmox:
timedatectl status
# If out of sync, resynchronize
ntpdate -u pool.ntp.org
2. SSL/TLS Errors When Using Port 636
If you enable LDAPS for encryption, Proxmox will recipient the connection if it doesn’t trust the DC’s Certificate. You need to download the DC’s CA certificate, copy it to /usr/local/share/ca-certificates/, and run update-ca-certificates for the system to recognize it.
Pro Tip: Never Lock the Local Root Account
No matter how convenient AD is, always keep a local root account with a secure physical password. If the Domain Controller fails or the network switch hangs, the local account is your only way to access and rescue the system.
Integrating AD isn’t just about looking “pro”; it’s a key step in standardizing your infrastructure. I hope this guide helps you eliminate manual tasks so you can focus on more exciting projects!